This post is about building a set of defensive layer around the process of uploading the file. File upload is a very critical process and often exploited by the hackers. The consequences of a successful file upload exploit could be complete disclosure of the source code of the target application or malware infection of the server.
There are 2 ways to store the uploaded file – in file system or in database. Here I will discuss pros and cons of both the approaches and also demonstrate how to implement secure file upload in PHP.
Approach-1: Storing uploaded file in file system
It is the most common and simplest method of storing a file but if it is not implemented with proper safety measures it could be the most dangerous one also. An attacker can upload a malicious file like – a webshell script or any executable binary into the folder and download the source code or install a backdoor in the server. Here I have built scenarios of how an attacker can exploit file system based file upload and as an auditor what you should suggest to implement:
>> Scenario-1: No input validation is implemented.
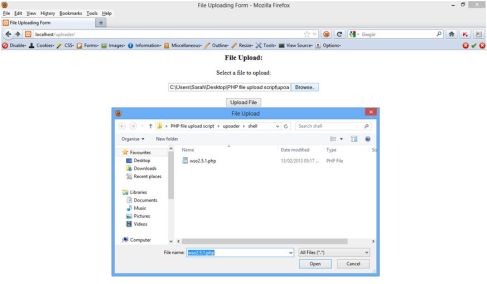
The attacker accesses the file upload page, clicks on browse and selects a PHP shell file and clicks on upload.
The file is uploaded successfully.
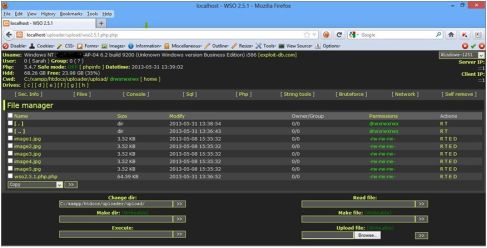
Now the attacker accesses the shell file from URL and downloads the source code of the application.
Lesson: Input validation is a must and as we know that client side validation is as good as no validation and can easily be bypassed through any client side proxy tool. Therefore server side validation should be implemented.
>> Scenario-2: A server side validation on file extension is implemented.
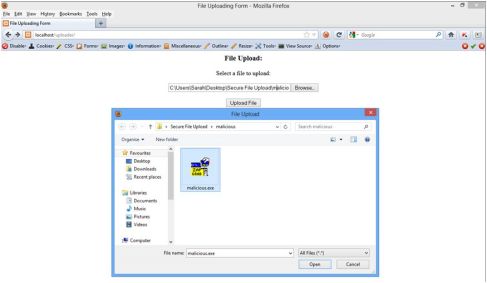
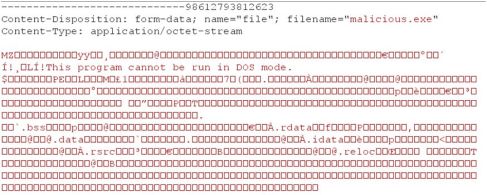
An attacker accesses the file upload page, clicks on browse and selects an exe file to upload.
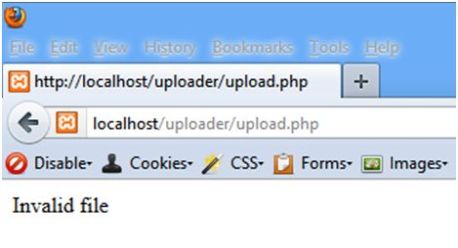
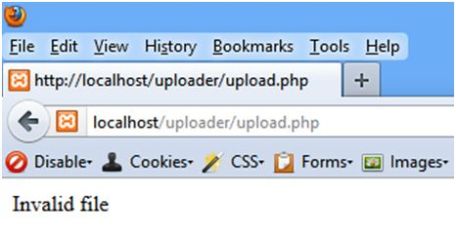
He clicks on upload and an error message is shown to the attacker.
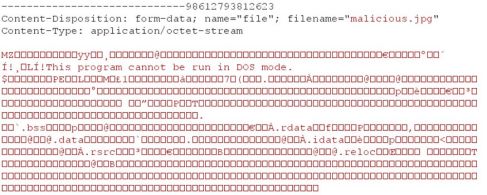
Now he again clicks on browse, selects the same exe file and captures the http request in burp proxy.
He changes the file extension to jpg from exe and forwards the request to server.
This time the file is uploaded successfully.
Lesson: Validating file extension is not sufficient to prevent malicious file upload.
>> Scenario-3: A server side validation on extension & content-type is implemented.
content-type is an HTTP header which contains the content type of a file, for example – if a file is jpg, the content-type header will show ‘image/jpg’ which means it is an image file with extension jpg.
An attacker accesses the file upload page and clicks on browse. He clicks on upload and captures the request in burp. He manipulates the extension to jpg and forwards the request.
An error message is displayed to the attacker.
Now the attacker repeats the same process but this time he changes the values of file extension to jpg as well as content-type to image/jpg from ‘application data/octet-stream’.
He forwards the request and the malicious file is uploaded successfully.
Lesson: The file extension and content-type values can be manipulated; therefore even a combination of these is not sufficient.
>> Scenario-4: A server side validation on file extension, content-type and actual content of the file is implemented.
Each scripting language has in-built functions to read the content of the file and derive the content-type out of it. This type of functions might be useful to prevent malicious file upload.
An attacker accesses the file upload page and clicks on browse. He clicks on upload and captures the request in burp. He manipulates the extension to jpg & content-type to image/jpg and forwards the request.
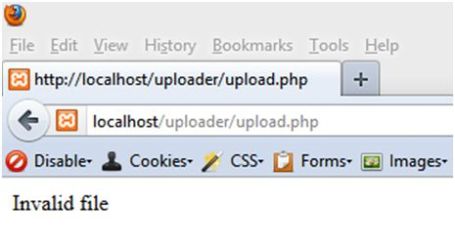
Still an error message is displayed to the attacker.
It confirms that if the content of file is validated and content-type is derived from the content an attacker cannot bypass it.
A sample image file upload code in PHP is given below. Make sure that you go through the comments also to understand the functions.
Note: Enable ‘php_fileinfo.dll’ extension in php.ini file before executing the code. To enable an extension remove ‘;’ before it.
A simple file upload page – index.php
<html>
<head>
<title>File Uploading Form</title>
</head>
<body>
<h3 align=”center”>File Upload:</h3>
<p align=”center”>Select a file to upload:</p>
<!– encryption type is added to tell that the form input is a file –>
<div align=”center”><form action=”upload.php” method=”post” enctype=”multipart/form-data”>
<input type=”file” name=”file” size=”50″ />
<p></p>
<input type=”submit” value=”Upload File” />
</form><div>
</body>
</html>
PHP code – Upload.php
<?php
// create a whitelist of the extensions
$allowedExts = array(“gif”, “jpeg”, “jpg”, “png”);
// obtain the extension of the uploaded file and storeit in a variable
$explode = explode(“.”, $_FILES[“file”][“name”]);
$extension = end($explode);
//echo finfo_file(finfo_open(FILEINFO_MIME_TYPE), $_FILES[“file”][“tmp_name”]);
// validate the content-type header of uploaded file
if ((($_FILES[“file”][“type”] == “image/gif”)
|| ($_FILES[“file”][“type”] == “image/jpeg”)
|| ($_FILES[“file”][“type”] == “image/jpg”)
|| ($_FILES[“file”][“type”] == “image/pjpeg”)
|| ($_FILES[“file”][“type”] == “image/x-png”)
|| ($_FILES[“file”][“type”] == “image/png”))
&& ($_FILES[“file”][“size”] < 1000000000)
// validate file extension
&& in_array($extension, $allowedExts)
// check file content and derive the actual content-type, the validate it with the allowed content-types
&& (finfo_file(finfo_open(FILEINFO_MIME_TYPE), $_FILES[“file”][“tmp_name”]) == “image/gif”
|| finfo_file(finfo_open(FILEINFO_MIME_TYPE), $_FILES[“file”][“tmp_name”]) == “image/jpeg”
|| finfo_file(finfo_open(FILEINFO_MIME_TYPE), $_FILES[“file”][“tmp_name”]) == “image/jpg”
|| finfo_file(finfo_open(FILEINFO_MIME_TYPE), $_FILES[“file”][“tmp_name”]) == “image/pjpeg”
|| finfo_file(finfo_open(FILEINFO_MIME_TYPE), $_FILES[“file”][“tmp_name”]) == “image/x-png”
|| finfo_file(finfo_open(FILEINFO_MIME_TYPE), $_FILES[“file”][“tmp_name”]) == “image/png”))
{
if ($_FILES[“file”][“error”] > 0)
{
echo “Error: ” . $_FILES[“file”][“error”] . “<br>”;
}
else
{
// store the file in a temporary storage first
echo “Upload: ” . $_FILES[“file”][“name”] . “<br>”;
echo “Type: ” . $_FILES[“file”][“type”] . “<br>”;
echo “Size: ” . ($_FILES[“file”][“size”] / 1024) . ” kB<br>”;
echo “Stored in: ” . $_FILES[“file”][“tmp_name”] . “<br>”;
}
if (file_exists(“C:/xampp/htdocs/uploader/upload/” . $_FILES[“file”][“name”]))
{
echo $_FILES[“file”][“name”] . ” already exists. “;
}
else
{
// move file to a permanent storage in the file system
/* change the filename with a customized filename.
Here the filename is generated by the combination of system time and hostname of the users’ system */
move_uploaded_file($_FILES[“file”][“tmp_name”], “C:/xampp/htdocs/uploader/upload/” . time() . gethostbyaddr($_SERVER[“REMOTE_ADDR”]) . ‘.’ . $extension);
echo “Permanently Stored in: ” . “C:/xampp/htdocs/uploader/upload/” . $_FILES[“file”][“name”];
}
}
else
{
echo “Invalid file”;
}
?>
However there are various methods through which an attacker can attach a malicious code in an image file and upload it to the server. Normally content validating function checks starting 10-15 lines of the content due to performance issues like speed of upload and resource utilization etc.
Basic Rules to implement secure file upload in file system:
- Implement strict server side validation on content of the file. Additionally file extension and content-type can also be validated.
- Create a customized file name before storing it to a permanent storage in file system. For example – append system time (time()) and hostname of the user (gethostbyaddr($_SERVER[REMOTE_ADDR])). Refer upload.php code to understand the function.
- Do not store the file in document root. If document root is C:/xampp/htdocs/uploader then create a directory C:/xampp/htdocs/uploads and use it to store uploaded files. This way the attacker cannot retrieve the source files directly.
- Implement strict server side validation on file size.
- Apply server side restrictions to remove EXECUTE permission from the uploaded files and upload folder.
- Limit number of file uploads or implement CAPTCHA to prevent DoS attack.
- Disable directory listing in the web server.
Approach-2: Storing uploaded file in database
Storing files is database is a better approach than storing in file system. It does not allow users to execute files directly from the URL as it is not stored in a directory. The key point is to validate the content of the file before storing it to database.
A sample image file upload code in PHP is given below.
Upload file – upload.php
<?php
include ‘connection.php’;
$allowedExts = array(“gif”, “jpeg”, “jpg”, “png”);
$explode = explode(“.”, $_FILES[“file”][“name”]);
$extension = end($explode);
echo finfo_file(finfo_open(FILEINFO_MIME_TYPE), $_FILES[“file”][“tmp_name”]);
if ((($_FILES[“file”][“type”] == “image/gif”)
|| ($_FILES[“file”][“type”] == “image/jpeg”)
|| ($_FILES[“file”][“type”] == “image/jpg”)
|| ($_FILES[“file”][“type”] == “image/pjpeg”)
|| ($_FILES[“file”][“type”] == “image/x-png”)
|| ($_FILES[“file”][“type”] == “image/png”))
&& ($_FILES[“file”][“size”] < 1000000000)
&& in_array($extension, $allowedExts)
&& (finfo_file(finfo_open(FILEINFO_MIME_TYPE), $_FILES[“file”][“tmp_name”]) == “image/gif”
|| finfo_file(finfo_open(FILEINFO_MIME_TYPE), $_FILES[“file”][“tmp_name”]) == “image/jpeg”
|| finfo_file(finfo_open(FILEINFO_MIME_TYPE), $_FILES[“file”][“tmp_name”]) == “image/jpg”
|| finfo_file(finfo_open(FILEINFO_MIME_TYPE), $_FILES[“file”][“tmp_name”]) == “image/pjpeg”
|| finfo_file(finfo_open(FILEINFO_MIME_TYPE), $_FILES[“file”][“tmp_name”]) == “image/x-png”
|| finfo_file(finfo_open(FILEINFO_MIME_TYPE), $_FILES[“file”][“tmp_name”]) == “image/png”))
{
if ($_FILES[“file”][“error”] > 0)
{
echo “Error: ” . $_FILES[“file”][“error”] . “<br>”;
}
else
{
echo “Upload: ” . $_FILES[“file”][“name”] . “<br>”;
echo “Type: ” . $_FILES[“file”][“type”] . “<br>”;
echo “Size: ” . ($_FILES[“file”][“size”] / 1024) . ” kB<br>”;
echo “Stored in: ” . $_FILES[“file”][“tmp_name”] . “<br>”;
$fileName = $_FILES[‘file’][‘name’];
$fp = fopen($tmpName, ‘r’);
$content = fread($fp, filesize($tmpName));
$content = addslashes($content);
//echo $content;
fclose($fp);
$query = “INSERT INTO upload (‘file_name’, ‘file_content’) VALUES (‘$fileName’, $content)”;
$result = mysql_query($query);
if(!$result)
{
echo “Could not add this file.”;
}
}
}
else
{
echo “Invalid file”;
}
?>
Database connection file – connection .php
<?php
$con = mysql_connect(“localhost”,”root”,””,”uploads”);
mysql_close($con);
?>
Create a database ‘uploads’ and run following command to create a table ‘upload’:
CREATE TABLE `upload` (
`file_name` VARCHAR(25) NOT NULL,
`file_content` BLOB NOT NULL,
PRIMARY KEY (`file_name`)
) ENGINE=MyISAM DEFAULT CHARSET=latin1 COLLATE=latin1_general_ci;
Though file upload with the help of database is more secure than in file system, server side validation of file content is the most important control to prevent malicious file upload.





Its a very nice article over file upload……………………………………….It give a very clear view about file uploading exploitsssssssssssssssssssssssss
Thanks Samarth…..
It will be good if u can provide source code for each type separately.And I guess there is some problem in code also as I am unable to execute it.
It should work because I have tested it in my system. Don’t forget to enable php_fileinfo() extension before executing the code. Refer my post.